
5.04 | Uptrak Framer Course Sample
Intermediate Effects #2
Scroll Speed & Parallax Effects
Add interactive depth with scroll speed effects that respond to how users move.
In this lesson, you’ll build a parallax hero section and learn how to fine-tune scroll speed for different elements. We’ll also cover why scroll timing becomes trickier lower down the page as well as how to calculate it.
🗺️ getting Oriented
Scroll Speed lets you animate layers at different speeds as the user scrolls. This is what creates parallax effects, where foreground and background elements move independently, adding visual depth and momentum to a layout.
In this lesson, you'll learn how to apply scroll speed to build a responsive parallax hero, then go deeper by understanding how scroll speed works lower down the page. You'll learn the key setup steps, the math behind offset positioning, and a reliable formula to get scroll timing right across multiple sections. These techniques give you much more control over animation pacing and allow you to build layouts that feel dynamic and intentional.
Learning Outcomes
By the end of this lesson, you’ll be able to:
Explain how scroll speed works in Framer and what scroll multipliers actually control
Configure fixed-height sections and absolute-positioned child elements to prepare for scroll effects
Calculate Y offsets for scroll speed animations using a consistent formula based on section height and scroll lag
Apply scroll speed effects to multiple sections while keeping visual alignment and timing intact
Use parallax movement to bring depth and motion to landing pages, product sections, and hero banners
Contents
What is Scroll Speed
How to Set Up Your Page
The Magic Formula for Calculating Offset
Let’s Do Some Scroll Speed Calculations 🏋🏻♂️
What is Scroll Speed?
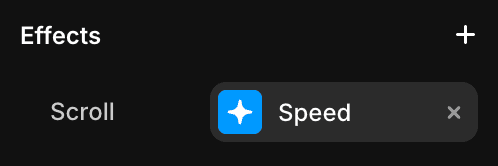
The Scroll Speed effect in Framer allows you to make an element scroll at a different rate to the rest of the page. This creates parallax and depth effects by making layers feel like they move independently from the main content.
Understanding Scroll Speed Multipliers
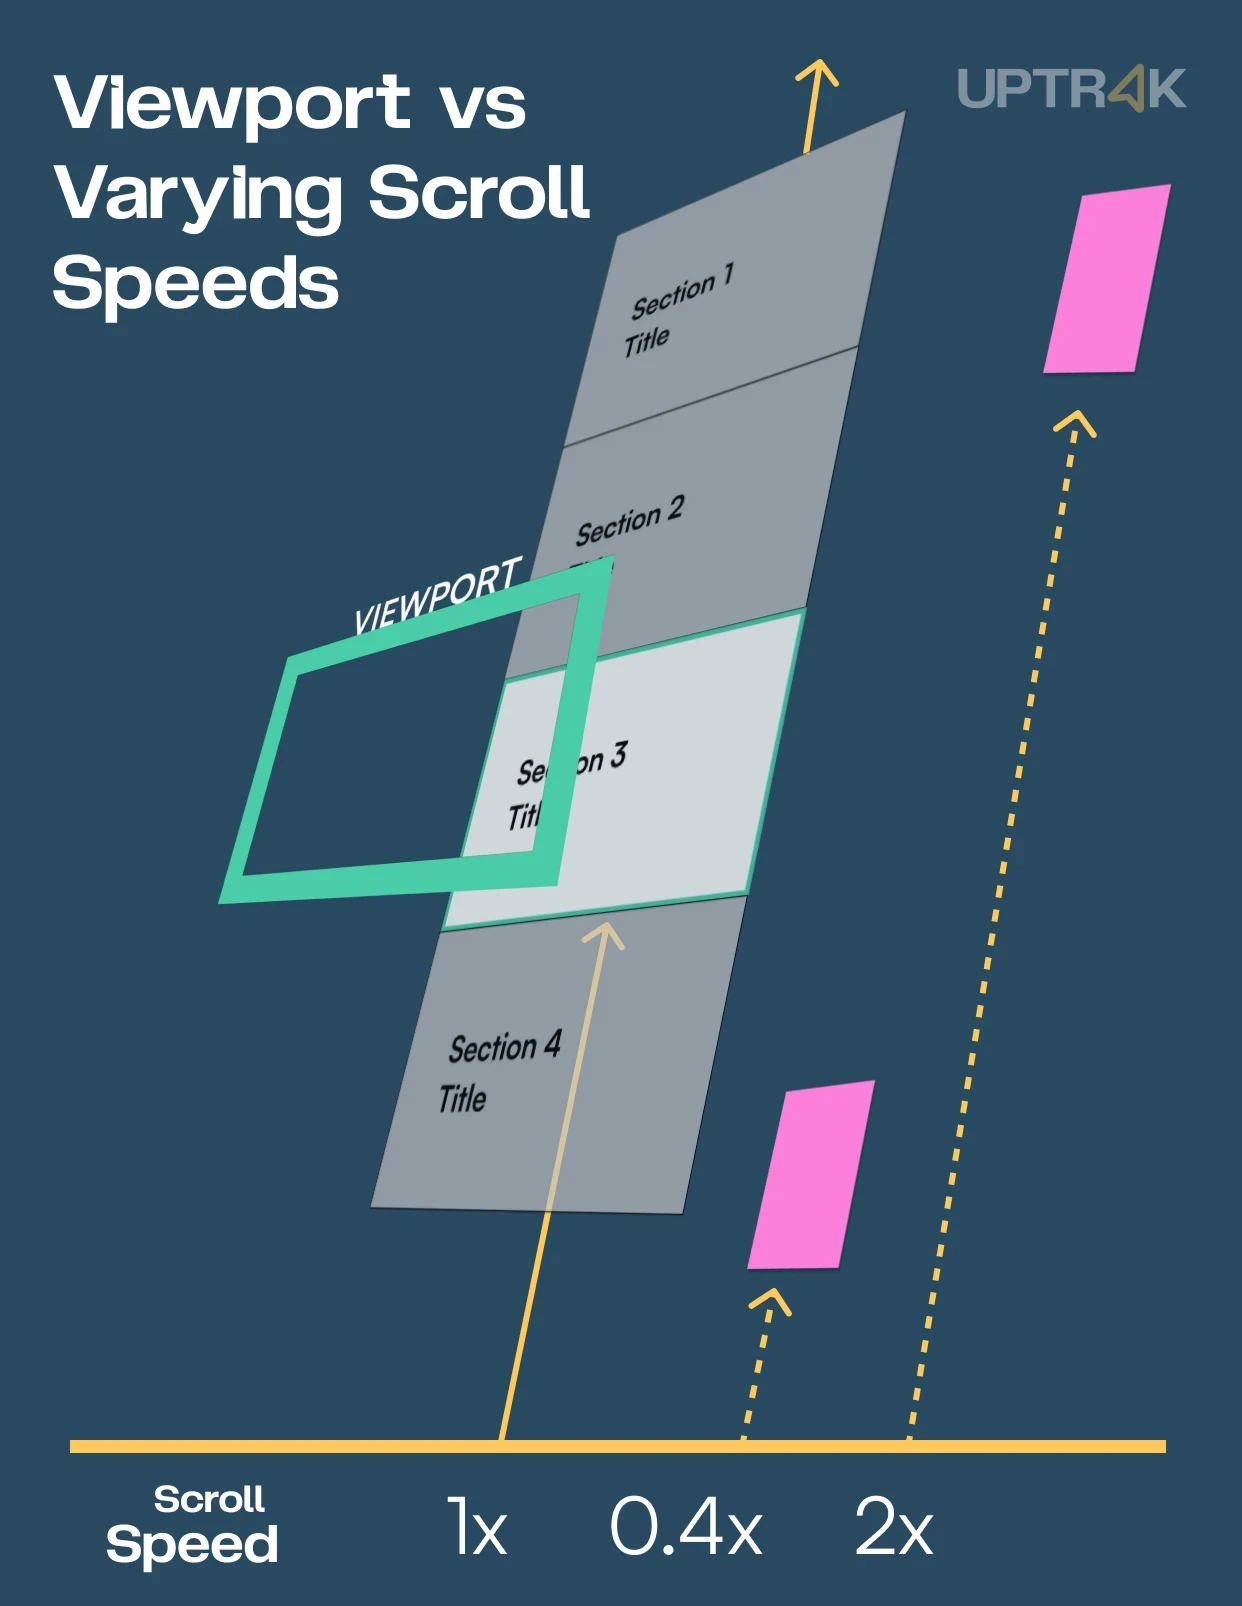
Before we begin, it's important to conceptualise that your viewport when you load a web page remains SET and static. When you scroll up and down, you're effectively moving that content UP and DOWN behind a STATIC viewport.
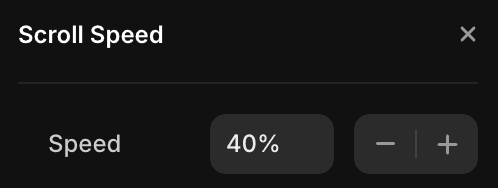
By default, all elements on a page scroll at a speed of 1. The Scroll Speed property lets you override this. You’re essentially telling the browser:
“For every 1 pixel of page scroll, I want this element to move X pixels.”
That means:
Accelerated elements (speed >1) appear to "rush ahead"
Decelerated elements (0< speed <1) often appear like they’re "floating"
Fixed/Static Elements (speed = 0) Simply stay put and do not move.
Meanwhile, elements with reversed/negative speed (speed <0) shoot upwards as you scroll down, and downwards as you scroll up!
How to set up your page to use the scroll speed effect
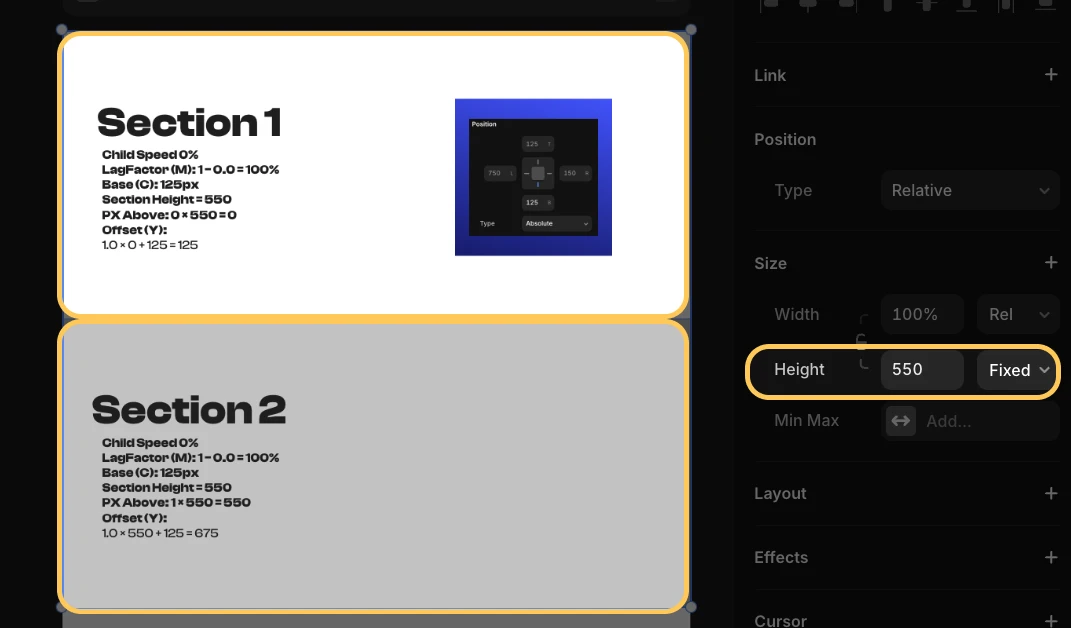
🏛️ Foundation 1: Use Fixed Height Section Containers
You'll want to set your sections (aka 'PARENT Containers') to have fixed height in pixels (e.g. 800px)
Using vh (viewport height) can create issues, because it's literally impossible to ascertain how many pixels tall the viewer's phone/tablet/computer viewport will be.
When configuring scroll speed, you need to do a bit of maths calculate how far down the page a section and element is. You can’t do that reliably if the height is changing based on the screen.
In that same vain, you'll want to avoid having your section's heights set to 'fill' or 'fit'
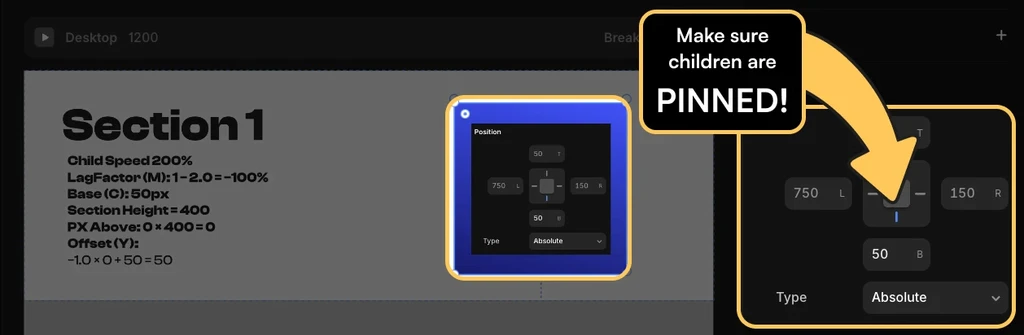
🏛️ Foundation 2: Use Absolute Positioning on Child Elements
In most cases, you'll want to set the position of the CHILD element (i.e. the thing receiving the Scroll Speed effect) to ABSOLUTE.
Only with ABSOLUTE positioning can you configure an OFFSET X and Y position. You'll see why that's important very shortly.
However, just be aware that animations generally require that you PIN child elements a specific number of Pixels from either the TOP or the BOTTOM (and/or left/right) of its parent container.
So, if a parent container is 800px tall, and a child element is 400px tall, and you wanted it to appear dead centre, that's the equivalent of pinning it 200px above the bottom (bottom_space + child_height + top_space = 200 + 400 + 200 = 800px)
Creating paralax Effects for Hero Sections: Easy as
In your hero section, it’s very easy to configure scroll speeds and parallax effects because the child element starts at the top of the page. So, their starting positions are more predictable, and no OFFSET calculations are needed.
Non-Hero Sections: When Scroll Speed Requires Maths
If you want to use scroll speed in more than one section on a given web page, get ready to do some calculations. Important concepts to understand:
On page load, every element on the page is given set Y and Y coordinates.
If you CHANGE THE SCROLL SPEED of any element beneath the initial fold, you also need to update it's starting X and Y coordinates (i.e. OFFSET its initial position).
If you DON'T do this, then by the time it enters the viewport, it will
at best be in the wrong position, or most likely;
be invisible in the viewport, because the actual element is somewhere well off-screen.
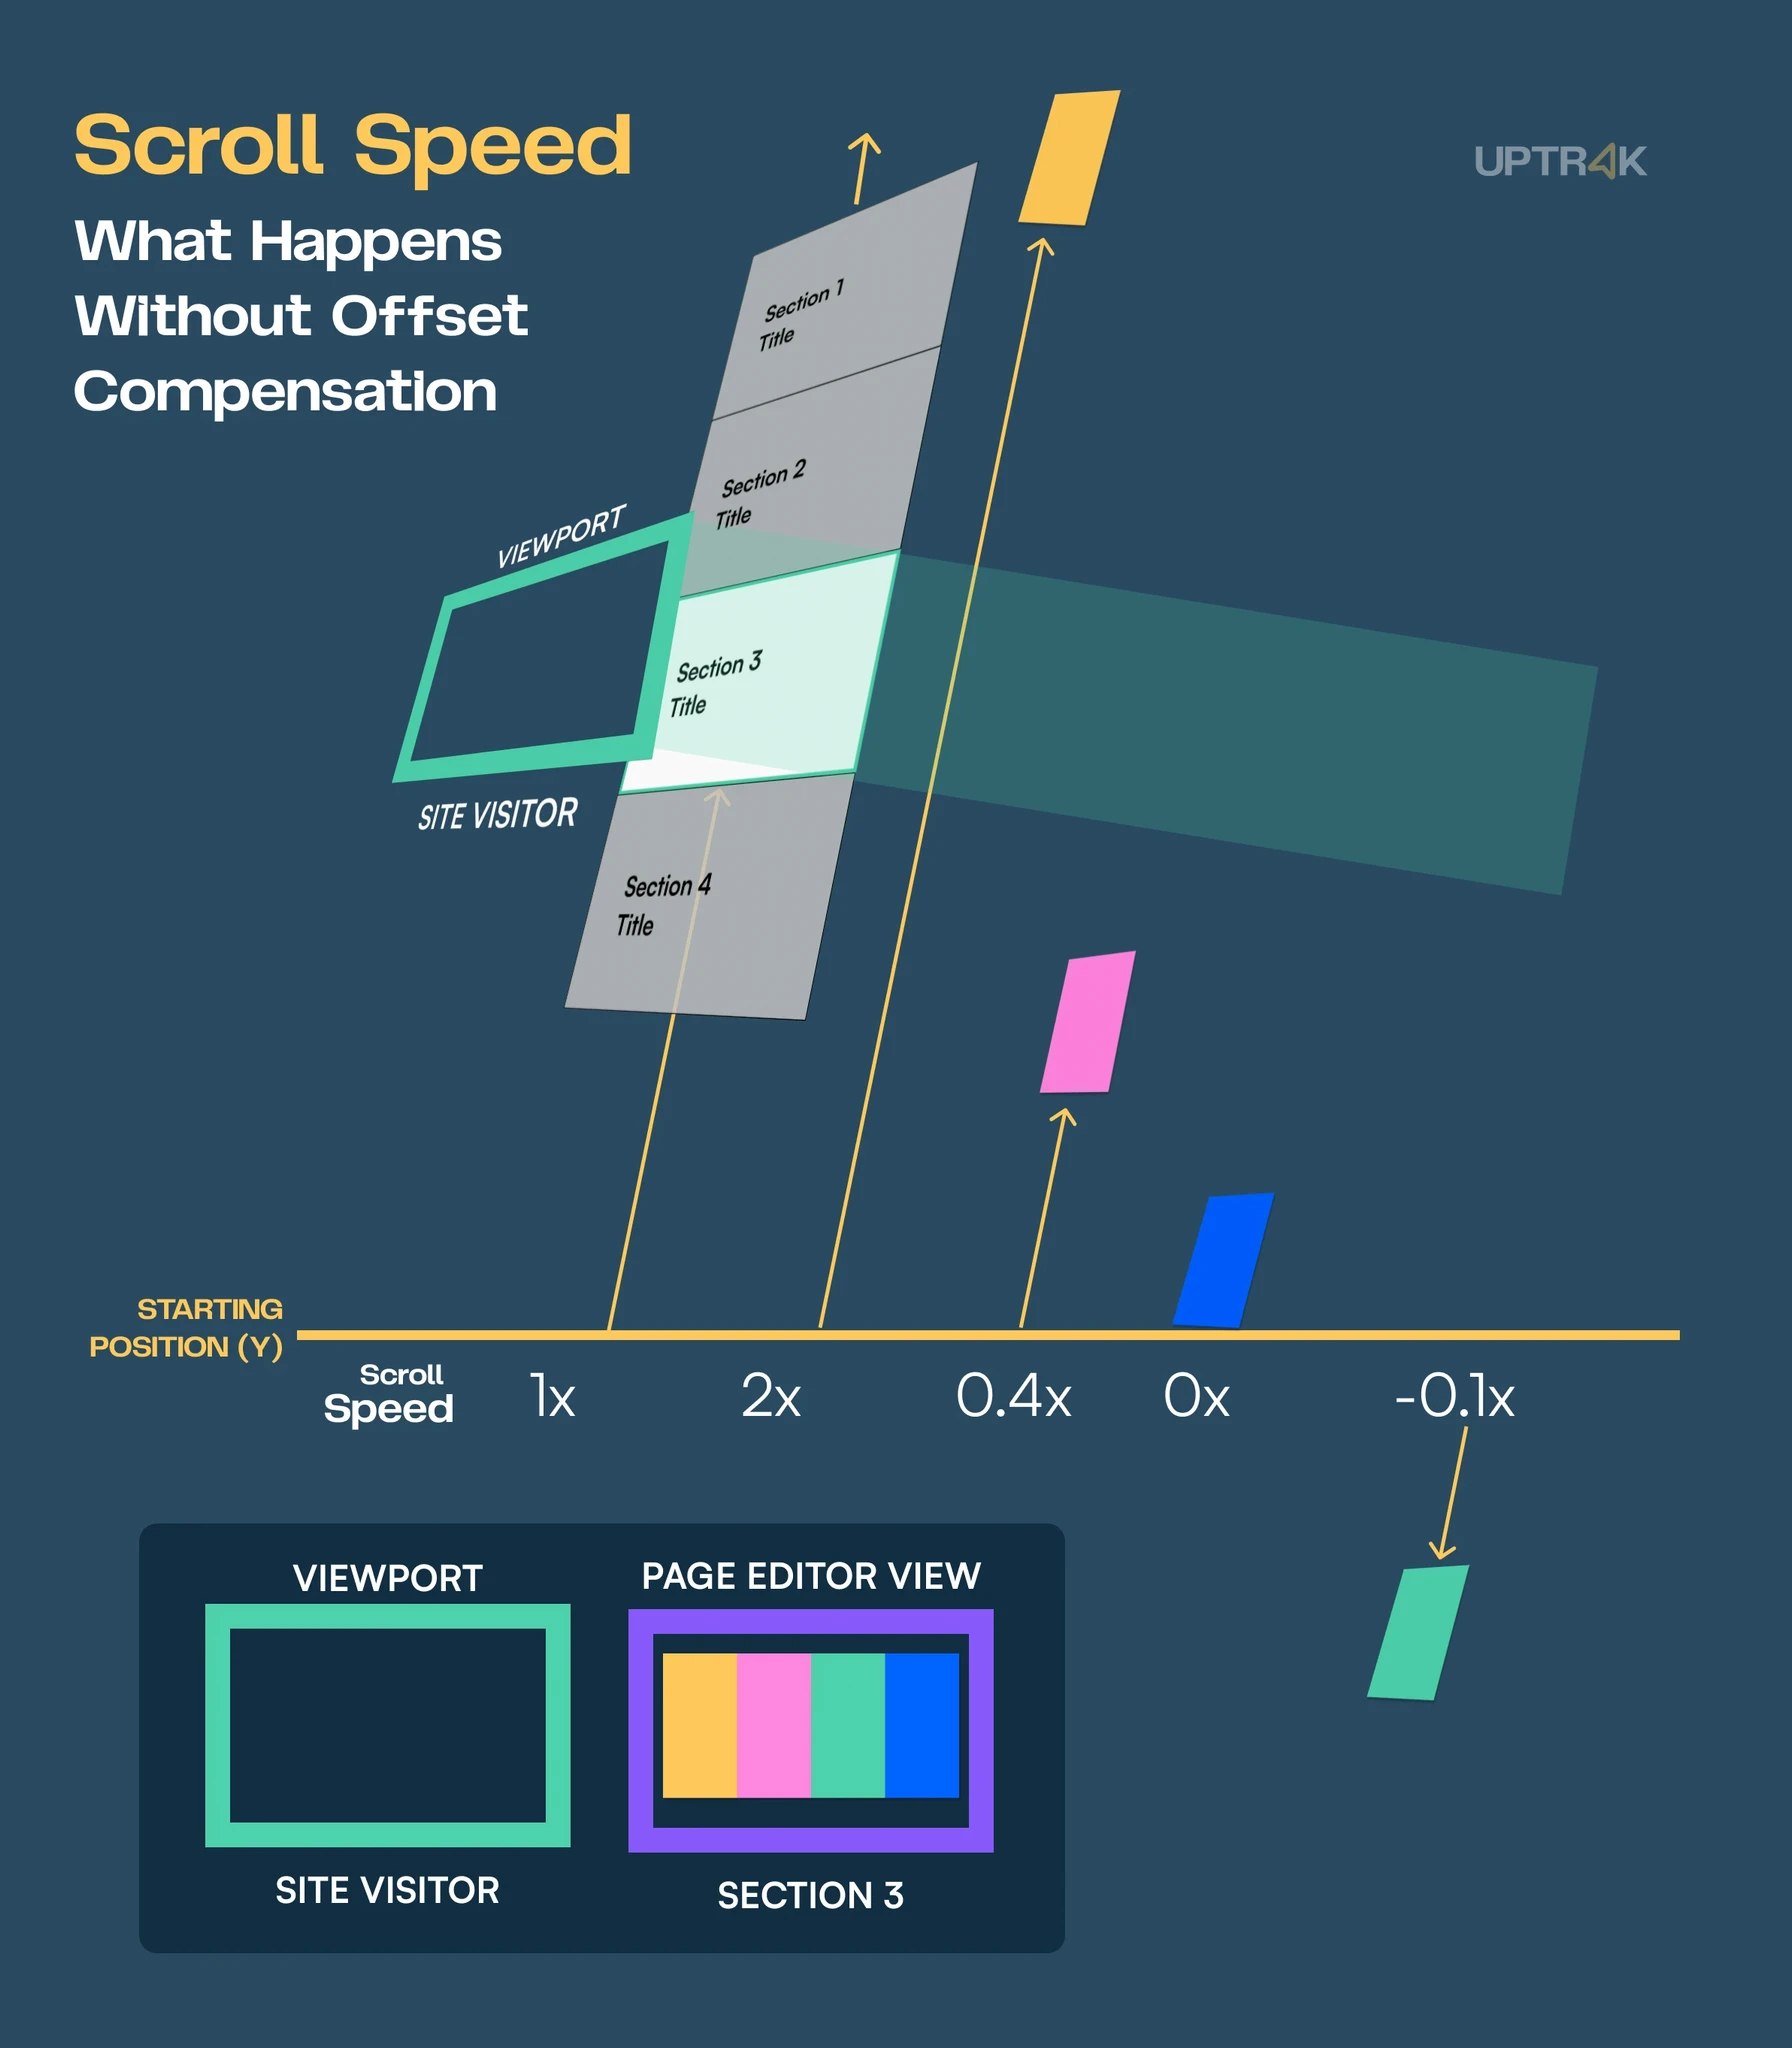
The above diagram shows the problem. In the Section 3 editor window, everything looks hunky dory. However by the time the visitor actually scrolls to section 3, none of the child elements are visible.
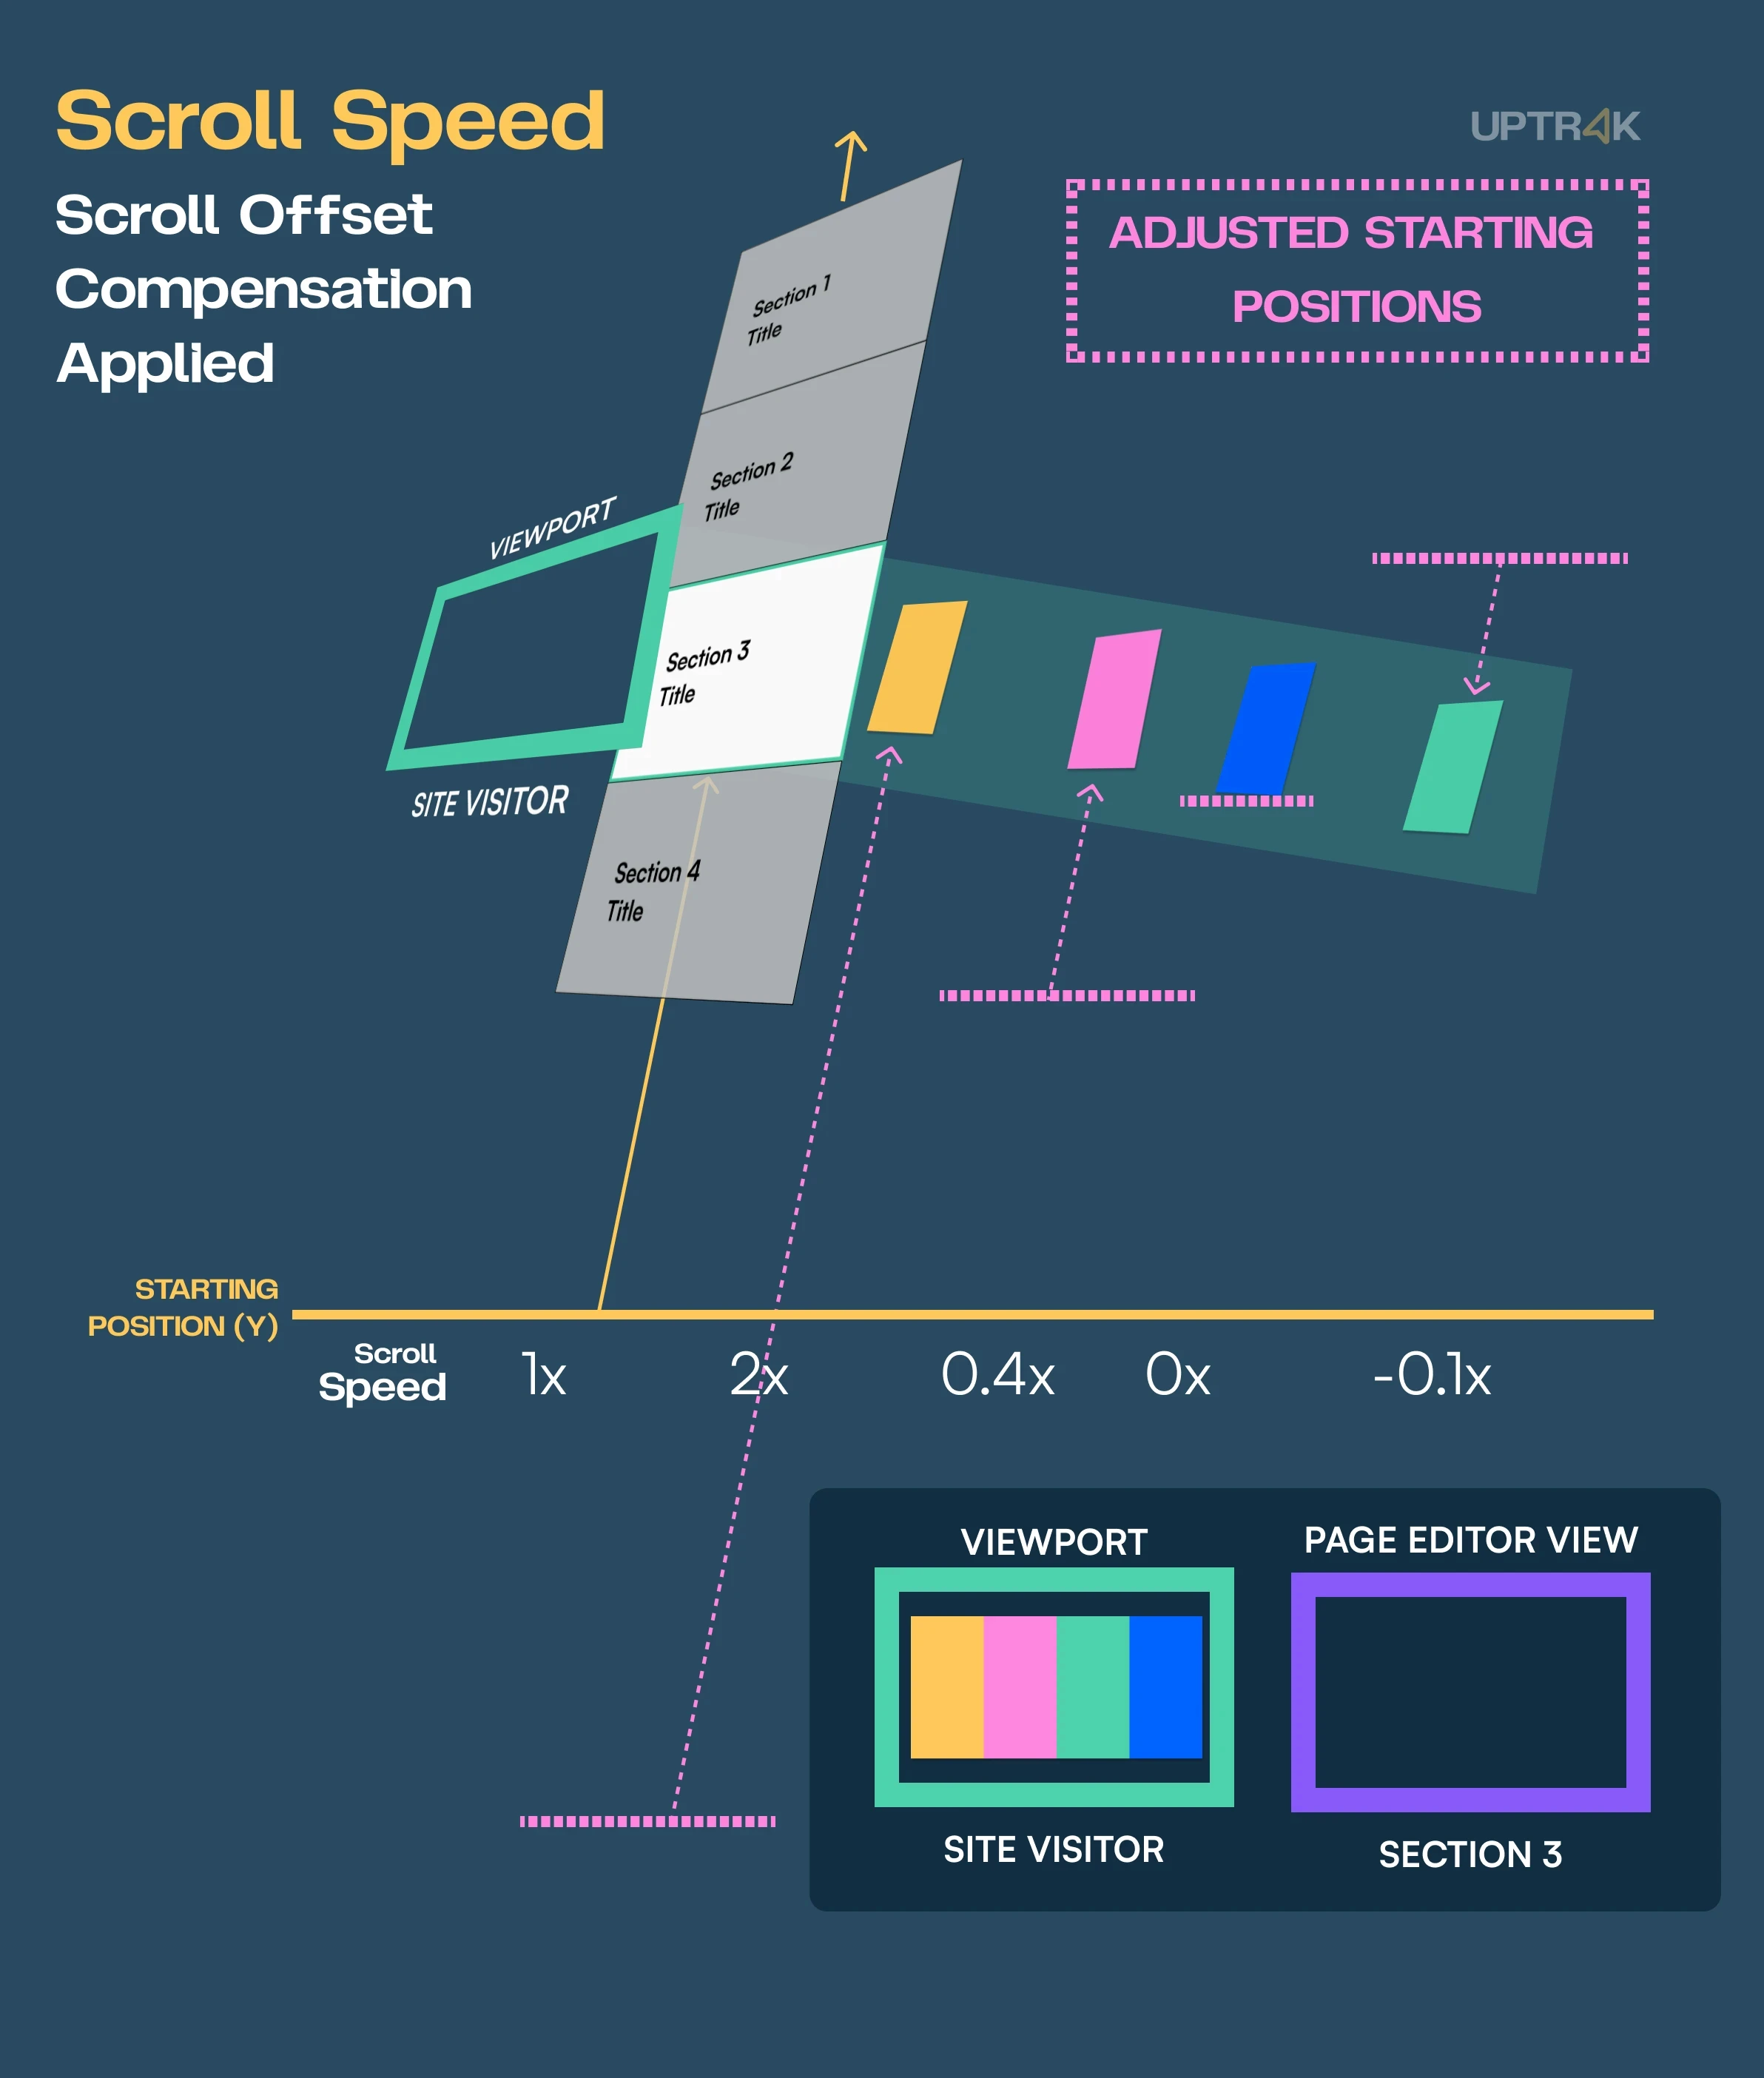
The solution is to OFFSET the starting positions of the child elements, so that they enter the viewport at the right time.
Noteworthy takeaways
Child elements MUST HAVE ABSOLUTE POSITIONING, as it must be possible to define a specified STARTING position. You cannot do this with relative positioning.
You need to know what you're doing, because, inside the Page editor view, you will not be able to see any of the child elements!
As you can see, the art of mastering scroll speed is learning to ensure these child elements appear in the viewport at right time. For this, we need a formula!
The Magic Formula for calculating offset
Y = MX + C
Offset = PXAbove × (1 - ChildSpeed) + Base
Child Speed:
i.e. 200%
In decimal (eg. 0.2 for 20%, -0.2 for -20%, 2.0 for 200%)
Offset (Y)
The absolute position offset value for the child element
In this example and all following examples, we will be pinning child elements to the BOTTOM of their Section containers. However, the logic would also work if pinning to the TOP.
Assumption: All four sections seek to achieve the same identical position when centred in the viewport.
LagFactor (M)
i.e. 1 - 2 = -1 = -100%
M = (1 − ChildSpeed) represents the rate of difference between the parent’s movement and the child’s movement.
In this context, it measures how much extra distance the parent travels beyond the child, which determines how far the child must be offset to remain visually aligned during scroll.
Base (C)
i.e. [400px - 300px] / 2 = 50px
Position needed to vertically centre a 300px child inside a 400px parent
So, [Parent Container Height - Child element height] / 2
AKA Child element's position offset in Section 1
PXAbove (X)
How many pixels there are above the child's parent SECTION
This captures how far down the scroll the section appears, which determines how much scroll distance contributes to the child’s visual lag or lead.
As all sections are equal height, this can be boiled down to [Count of sections above] × [standard section height]
All Parent sections have a set height of 400px
Play Along With the Interactive Demo!
Download the remix file from the button below, then follow along with the interactive guide directly underneath.

Demo not working? You can access it here:
🏋🏻♂️ Exercise: Let's do some scroll speed calculations
Let's create some standard buttons for your project!
Instructions
The instructions can be found in the interactive demo below.
Ignore steps 1->3. They are for users of the course
Instead, download and follow along with the Remix files below.
Once you've downloaded each, hit 'preview' to get a conceptual overview of what we're trying to achieve.
The goal is to master how to use the speed formula to calculate how to perfectly time each element's entry into the section 4 viewport.
If you get stuck, check out the explanations and calculations at the top, or peer under the hood at the other elements!
Good luck!
Demo not appearing?
You can find it here: https://guides.uptrak.io/share/cmbvuc9nh0004jp07camsa2c6/tour